15장. 파일론 소개
장고가 파이썬에서 가장 인기 있는 웹프레임워크이기는 하지만, 그 외에 다른 선택도 가능한다. 장고가 컨텐트 관리 솔루션을 재빨리 구현하고자하는 뉴스룸의 필요에 의하여 발전해온 것에 비해, 파일론은 통합해야 할 기존의 데이터베이스가 있으며 애플리케이션이 “컨텐트 관리” 공간에서 느슨하게 정의된 애플리케이션 클래스에 딱 들어맞지 않는 환경에서 웹 애플리케이션을 구축해야할 필요에 의하여 발전하였다.
파일론*Pylons*의 최대 강점은 그것의 기술 스택을 구축하는 데에 best-of-breed 접근법을 취하고 있다는 것이다. 장고는 모든 것을 “내장”하며 애플리케이션이 어떠해야하는지에 대한 단일한 관점에서 전체 애플리케이션 스택이 구체적으로 디자인되어 있는 반면, 파일론은 정확히 그 반대 방향에서 접근한다. 파일론은, pylons 이름 공간에 있는 코드 기반은, 매우 작다. 0.9.7 릴리스에서, 그것은 5,500 행의 코드로 이루어져있다. 그에 비하여, 장고는 125,000 행의 코드를 자랑한다.
파일론의 코드 기반이 매우 작은 것은, 기존의 라이브러리들을 잘 활용한 점에서 그 비결을 찾을 수 있으며, 파일론 커뮤니티에서는 다른 많은 파이썬 프로젝트에 참여하여 상호운용성을 증진시키기 위한 표준 API를 개발하고 있다.
궁극적으로, 장고나 파일론을 선택하는 것은 장단점을 살펴 이루고자하는 목적에 따라 결정할 일이다. 장고는 문서가 한 곳에 모여있고 모든 문서가 웹 애플리케이션 구축의 맥락에서 작성되어 매우 배우기 쉬운 반면, 장고의 디자인으로 인하여 유연성이 떨어진다.
예를 들어, 최근에 필자들이 수행한 프로젝트에서는, SQL Server 2000으로 구현한 nontrivial 데이터베이스와 상호작용을 할 필요가 있었다. 장고의 경우, SQL 서버 뒷단을 구현하는 것은 어려운 일이다. 윈도우에서 장고를 사용하는 웹 개발자가 많지 않기 때문에 SQL 서버는 관심 밖이다. 장고 ORM이 장고의 일부분이기는 하나, 장고의 주된 관심사는 아니다. 임의의 데이터베이스를 지원하는 것은 장고의 목표가 아니며, 이는 당연하다.
파일론에서 사용하는 SQLAlchemy는 파이썬에서 가장 강력한 데이터베이스 도구이다. It None focuses on database access. CPython으로 구현된 SQL Server 뒷단이 이미 안정화되어 있으며, 자이썬 뒷단을 위한 추가 코드를 구현하는 데에는 이틀이 걸린다–그리고 이러한 일을 하는 데에 있어서 SQLAlchemy 내부의 코드를 전혀 살펴볼 필요가 없다.
That experience alone sold us on Pylons. 웹 프레임워크를 개발하는 사람들이 데이터베이스에 대해서도 전문가여야만 하는 상황에 의존할 필요가 없다. 마찬가지로, 데이터베이스 전문가들이 웹 템플릿 작업에 대하여 알 이유도 없다.
In short, when you have to deal with the non-standard things, Pylons makes a fabulous choice, and, let’s be honest, there’s almost always non-standard things you’re going to have to do.
간단한 안내
파일론을 설치하는 가장 좋은 방법은 virtualenv 안에 두는 것이다. 자이썬을 위한 새로운 virtualenv를 생성하고 easy_install을 실행한다.
예제 15-1.
> easy_install "Pylons==0.9.7"
Create your application:
> paster create --template=pylons RosterTool
이 명령을 초기화한 후에는, 애플리케이션에 대한 정보를 입력을 요구할 것이다. 프롬프트마다 엔터를 입력하여 기본값을 사용하도록 하자. 기본값을 입력하고 나면, 애플리케이션이 생성될 것이다. 애플리케이션과 동일한 이름의 디렉토리가 현재 디렉토리 내에 생성된 것을 볼 수 있을 것이다. 그 디렉토리로 가면 .py 파일들과 그 외의 파일 두 개가 보일 것이다. 개발 환경을 설정하기 위하여, development.ini 파일을 텍스트 편집기로 열도록 하자. 여러 매개변수가 있는데, email_to에서 관리자의 이메일 주소를 설정하며 , 메일 애플리케이션을 구성하고자 한다면 smtp_server를 설정하면 된다. 이 예제를 위하여, 설정 파일을 그대로 두고 진행하도록 하겠다.
Next, launch the development server using the following command from within the application (RosterTool) directory:
> paster serve --reload development.ini
Open a browser and connect tohttp://127.0.0.1:5000/, and you should see something that lookssimilar to Figure 15-1.
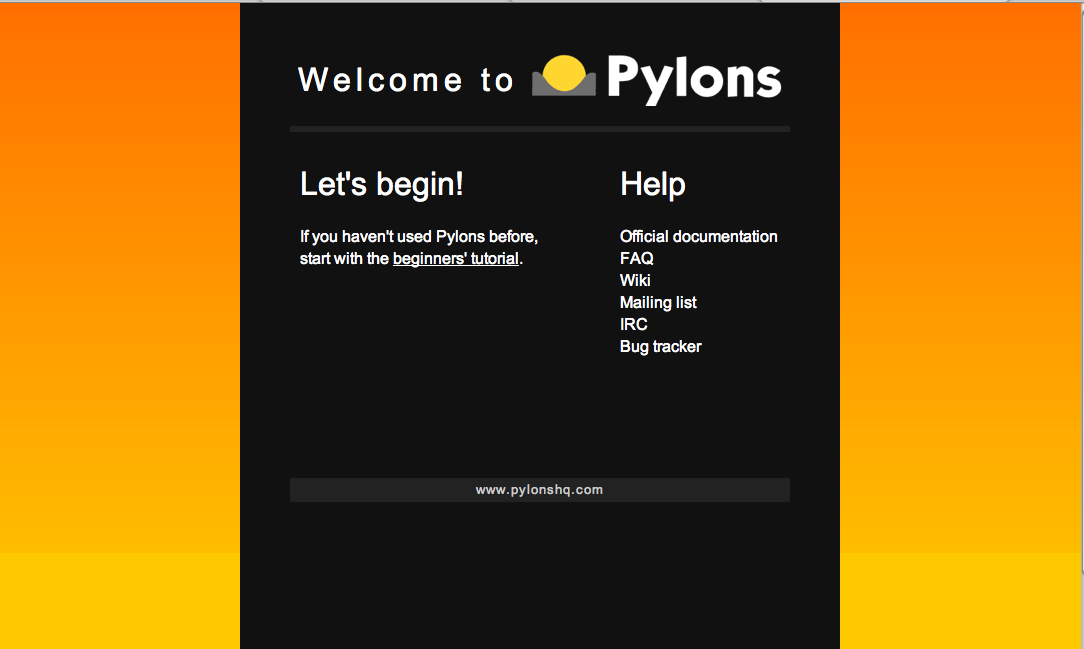
*Figure 15-1. Pylons server *
Now that we have the development server running, it is good to note that we can stop the server at any time by pressing Ctrl+C on the keyboard.
Now we have the base application created, and it is time to add some content. It is easy to create static HTML files for your Pylons application. Let’s create a static file named welcome.html and drop it into RosterTool/rostertool/public/ directory.
Listing 15-2.
<html>
    <body>Just a static file</body>
</html>
You should now be able to load the static content by taking your browser to http://localhost:5000/welcome.html.
To create web content that handles requests, we need to create a controller for our application. A controller is a Python module that we map to a URL so that when the URL is visited, the controller is invoked. To add a controller, let’s start by initiating the following command:
RosterTool/rostertool > paster controller roster
Paste will install a directory named “controllers” inside the rostertool directory and install some files in there including a module named roster.py. You can open it up and you’ll see a class named “RosterController” and it will have a single method “index.” Pylons is smart enough to automatically map a URL to a controller classname and invoke a method. We’ll learn more about mapping URLs later in the chapter. To invoke the RosterController’s index method, you just need to start the development server again and invoke the following:
http://localhost:5000/roster/index
Congratulations, you’ve got your most basic possible web application running now. It handles basic HTTP GET requests and calls a method on a controller and a response comes out. Let’s cover each of these pieces in detail now.
A Note about Paste
While you were setting up your toy Pylons application, you probably wondered why Pylons seems to use a command line tool called “paster” instead of something obvious like “pylons.” Paster is actually a part of the Paste set of tools that Pylons uses.
Paste is used to build web applications and frameworks, but most commonly it is used to build web application frameworks like Pylons. Every time you use “paster,” that’s Paste being called. Every time you access the HTTP request and response objects, that’s WebOb, a descendant of Paste’s HTTP wrapper code. Pylons uses Paste extensively for configuration management, testing, basic HTTP handling with WebOb. You would do well to at least skim over the Paste documentation to see what is available in paste, it is available at http://pythonpaste.org/.
Pylons MVC
Pylons, like Django and any reasonably sane webframework (or GUI toolkit for that matter) uses the model-view-controller design pattern.
Table 15-1 shows what this maps to in Pylons.
**Table 15-1. **Pylon MVC design pattern mapping
| Component | Implementation |
|---|---|
| Model | SQLAlchemy (or any other database toolkit you prefer) |
| View | Mako (or any templating language you prefer) |
| Controller | Plain Python code |
To reiterate, Pylons is about letting you, the application developer, decide on the particular tradeoffs you’re willing to make. If using a template language more similar to the one in Django is better for your web designers, then switch go Jinja2. If you don’t really want to deal with SQLAlchemy, you can use SQLObject, files, a non-relational database, or raw SQL, if you prefer.
Pylons provides tools to help you hook these pieces together in a rational way.
Routes is a library that maps URLs to classes. This is your basic mechanism for dispatching methods whenever your webserver is hit. Routes provides similar functionality to what Django’s URL dispatcher provides.
Webhelpers is the defacto standard library for Pylons. It contains commonly used functions for the web, such as flashing status messages to users, date conversion functions, HTML tag generation, pagination functions, text processing, and the list goes on.
Pylons also provides infrastructure so that you can manipulate things that are particular to web applications including:
- WSGI middleware to add cross-cutting functionality to your application with minimal intrusion into your existing codebase.
- A robust testing framework, including a shockingly good debugger you can use through the web.
- Helpers to enable REST-ful API development so you can expose your application as a programmatic interface.
Later in this chapter, we’ll wrap up the hockey roster up in a web application. We’ll target a few features:
- Form handling and validation to add new players through the web
- Login and authentication to make sure not anybody can edit our lists
- Add a JSON/REST api so that we can modify data from other tools
In the process, we’ll use the interactive debugger from both command line and through the web to directly observe and interact with the state of the running application.
An Interlude into Java’s Memory Model
A note about reloading: sometimes if you’re doing development with Pylons on Jython, Java will through an OutOfMemory error like this:
Listing 15-3.
java.lang.OutOfMemoryError: PermGen space
    at java.lang.ClassLoader.defineClass1(Native Method)
    at java.lang.ClassLoader.defineClass(ClassLoader.java:620)
ava keeps track of class definitions in something called the Permanent Generation heap space. This is a problem for Pylons when the HTTP threads are restarted and your classes are reloaded. The old class definitions don’t go away; they never get garbage collected. Because Jython is dynamically creating Java classes behind the scenes, each time your development server restarts, you’re potentially getting hundreds of new classes loaded into the JVM.
Repeat this several times and it doesn’t take long until your JVM has run out of permgen space and it keels over and dies
To modify the permgen heap size, you’ll need to instruct Java using some extended command line options. To set the heap to 128M, you’ll need to use “-XX:MaxPermSize=128M.”
To get this behavior by default for Jython, you’ll want to edit your Jython startup script in JYTHON_HOME/bin/jython (or jython.bat) by editing the line that reads:
Listing 15-4.
set_JAVA_OPTS=
to be
set_JAVA_OPTS=-XX:MaxPermSize=128M
This shouldn’t be a problem in production environments where you’re not generating new class definitions during runtime, but it can be quite frustrating during development.
Invoking the Pylons Shell
Yes, we’re going to start with testing right away because it will provide you with a way to explore the Pylons application in an interactive way.
Pylons gives you an interactive shell much like Django’s. You can start it up with the following commands:
Listing 15-5.
RosterTool > jython setup.py egg_info
RosterTool > paster shell test.ini
This will yield a nice interactive shell you can start playing with right away. Now let’s take a look at those request and response objects in our toy application.
Listing 15-6.
RosterTool > paster shell test.ini

Pylons Interactive Shell
Jython 2.5.0 (Release_2_5_0:6476, Jun 16 2009, 13:33:26)
[OpenJDK Server VM (Sun Microsystems Inc.)]

All objects from rostertool.lib.base are available
Additional Objects:
mapper     -  Routes mapper object
wsgiapp    -  This project's WSGI App instance
app        -  paste.fixture wrapped around wsgiapp

>>> resp = app.get('/roster/index')
>>> resp
<Response 200 OK 'Hello World'>
>>> resp.req
<Request at 0x43 GET http://localhost/roster/index>
Pylons lets you actually run requests against the application and play with the resulting response. Even for something as “simple” as the HTTP request and response, Pylons uses a library to provide convenience methods and attributes to make your development life easier. In this case, it’s WebOb.
The request and the response objects both have literally dozens of attributes and methods that are provided by the framework. You will almost certainly benefit if you take time to browse through WebOb’s documentation, which is available at http://pythonpaste.org/webob/.
Here’s four attributes you really have to know to make sense of the request object. The best thing to do is to try playing with the request object in the shell.
request.GET
GET is a special dictionary of the variables that were passed in the URL. Pylons automatically converts URL arguments that appear multiple times into discrete key value pairs.
Listing 15-7.
>>> resp = app.get('/roster/index?foo=bar&x=42&x=50')
>>> resp.req.GET
UnicodeMultiDict([('foo', u'bar'), ('x', u'42'), ('x', u'50')])
>>> resp.req.GET['x']
u'50'
>>> resp.req.GET.getall('x')
[u'42', u'50']
Note how you can get either the last value or the list of values depending on how you choose to fetch values from the dictionary. This can cause subtle bugs if you’re not paying attention.
request.POST
POST is similar to GET, but appropriately: it only returns the variables that were sent up during an HTTP POST submission.
request.params
Pylons merges all the GET and POST data into a single MultiValueDict. In almost all cases, this is the one attribute that you really want to use to get the data that the user sent to the server.
request.headers
This dictionary provides all theHTTP headers that the client sent to the server.
Context Variables and Application Globals
Most web frameworks provide a request scoped variable to act as a bag of values. Pylons is no exception: whenever you create a new controller with paste, it will automatically import an attribute ‘c’ which is the context variable.
This is one aspect of Pylons that we’ve found to be frustrating. The ‘c’ attribute is code generated as an import when you instruct paste to build you a new controller. The ‘c’ value is None an attribute of your controller—Pylons has special global threadsafe variables, this is just one of them. You can store variables that you want to exist for the duration of the request in the context. These values won’t persist after the request/response cycle has completed, so don’t confuse this with the session variable.
The other global variable you’ll end up using a lot is pylons.session. This is where you’ll store variables that need to persist over the course of several request/response cycles. You can treat this variable as a special dictionary: just use standard Jython dictionary syntax and Pylons will handle the rest.
Routes
Routes is much like Django’s URL dispatcher. It provides a mechanism for you to map URLs to controllers classes and methods to invoke.
Generally, we find that Routes makes a tradeoff of less URL matching expressiveness in exchange for simpler reasoning about which URLs are directed to a particular controller and method. Routes doesn’t support regular expressions, just simple variable substitution.
A typical route will look something like this
map.connect(‘/{mycontroller}/{someaction}/{var1}/{var2}’)
This route would find the controller called “mycontroller” (note the casing of the class) and invoke the “someaction” method on that object. Variables var1 and var2 would be passed in as arguments.
The connect() method of the map object will also take in optional arguments to fill in default values for URLs that do not have enough URL-encoded data in them to properly invoke a method with the minimum required number of arguments. The front page is an example of this; let’s try connecting the frontpage to the Roster.index method.
Edit RosterTool/rostertool/config/routing.py so that there are 3 lines after #CUSTOM_ROUTES_HERE that should read like the following
Listing 15-8.
map.connect('/', controller='roster',action='index')  ---
map.connect('/{action}/{id}/',controller='roster')  ---
map.connect('/add_player/',controller='roster', action='add_player')
While this None like it should work, you can try running paster server: it won’t.
By default, Pylons always tries to serve static content before searching for controllers and methods to invoke. You’ll need to go to RosterTool/rostertool/public and delete the “index.html” file that paster installed when you first created your application. If you wanted to change the default implementation, you could tweak the middleware*.py* module to your liking.
Load http://localhost:5000/ again in your browser—the default index.html should be gone and you should now get your response from the controller method that is mapped to index, in this case, you should see “Hello World.”
Controllers and Templates
Leveraging off of the Table model we defined in Chapter 12, let’s create the hockey roster, but this time using the PostgreSQL database. We’ll assume that you have a PostgreSQL installation running that allows you to create new databases. You can also use a different database if you choose by simply creating a different engine with SQLAlchemy. For more details, please visit the documentation about creating database engines at http://www.sqlalchemy.org/docs/05/dbengine.html.
Begin by opening up a Pylons interactive shell and typing the following commands:
Listing 15-9.
>>> from sqlalchemy import *
>>> from sqlalchemy.schema import Sequence
>>> db = create_engine('postgresql+zxjdbc://myuser:mypass@localhost:5432/mydb')
>>> connection = db.connect()
>>> metadata = MetaData()
>>> player = Table('player', metadata,
...     Column('id', Integer, primary_key=True),
...     Column('first', String(50)),
...     Column('last', String(50)),
...     Column('position', String(30)))
>>> metadata.create_all(engine)
Now let’s wire the data up to the controllers, display some data, and get basic form handling working. We’re going to create a basic CRUD (create, read, update, delete) interface to the sqlalchemy model. Because of space constraints, this HTML is going to be very basic; but you’ll get a taste of how things fit together.
Paste doesn’t just generate a stub for your controller—it will also code generate an empty functional test case in rostertool/tests/functional/ as test_roster.py. We’ll visit testing shortly.
Controllers are really where the action occurs in Pylons. This is where your application will take data from the database and prepare it for a template to render it as HTML. Let’s put the list of all players on the front page of the site. We’ll implement a template to render the list of all players. Then, we’ll implement a method in the controller to override the index() method of Roster to use SQLAlchemy to load the records from disk and send them to the template.
Along the way, we’ll touch on template inheritance so that you can see how you can save keystrokes by subclassing your templates in Mako.
First, let’s create two templates, base.html and list_players.html in the rostertool/templates directory.
Listing 15-10. base.html
<html>
    <body>
        <div class="header">
            ${self.header()}
        </div>

        ${self.body()}
    </body>
</html>

<%def name="header()">
    <h1>${c.page_title}</h1>
    <% messages = h.flash.pop_messages() %>
    % if messages:
    <ul id="flash-messages">
        % for message in messages:
        <li>${message}</li>
        % endfor
    </ul>
    % endif
</%def>
Listing 15-11. list_players.html
<%inherit file="base.html" />
<table border="1">
    <tr>
        <th>Position</th><th>Last name</th><th>First name</th><th>Edit</th>
    </tr>
    % for player in c.players:
        ${makerow(player)}
    % endfor
</table>

<h2>Add a new player</h2>
${h.form(h.url_for(controller='roster', action='add_player'), method='POST')}
    ${h.text('first', 'First Name')} <br />
    ${h.text('last', 'Last Name')} <br />
    ${h.text('position', 'Position')} <br />
    ${h.submit('add_player', "Add Player")}
${h.end_form()}

<%def name="makerow(row)">
<tr>
    <td>${row.position}</td>\
    <td>${row.last}</td>\
    <td>${row.first}</td>\
    <td><a href="${h.url_for(controller='roster', action='edit_player', id=row.id)}">Edit</a></td>\
</tr>
</%def>
There’s quite a bit going on here. The base template lets Mako define a boilerplate set of HTML that all pages can reuse. Each section is defined with a <%def name=”block()”> section, and the blocks are overloaded in the subclassed templates. In effect, Mako lets your page templates look like objects with methods that can render subsections of your pages.
The list_players.html template has content that is immediately substituted into the self.body() method of the base template. The first part of our body uses our magic context variable ‘c’. Here, we’re iterating over each of the players in the database and rendering them into a table as a row. Note here that we can use the Mako method syntax to create a method called “makerow” and invoke it directly within our template.
Note
Mako provides a rich set of functions for templating. We’re only going to use the most basic parts of Mako: inheritance, variable substitution, and loop iteration to get the toy application working. I strongly suggest you dive into the Mako documentation to discover features and get a better understanding of how to use the template library.
Next, we add in a small form to create new players. The trick here is to see that the form is being generated programmatically by helper functions. Pylons automatically imports YOURPROJECT/lib/helpers (in our case, rostertool.lib.helpers) as the ‘h’ variable in your template. The helpers module typically imports functions from parts of Pylons or a dependent library to allow access to those features from anywhere in the application. Although this seems like a violation of “separation of concerns,” look at the template and see what it buys us: we get fully decoupled URLs from the particular controller and method that need to be invoked. The template uses a special routes function “url_for” to compute the URL that would have been mapped for a particular controller and method. The last part of our base.html file contains code to display alert messages.
Let’s take a look at our rostertool.lib.helpers module now.
Listing 15-12.
from routes import url_for
from webhelpers.html.tags import *
from webhelpers.pylonslib import Flash as _Flash

# Send alert messages back to the user
flash = _Flash()
Here, we’re importing the url_for function from routes to do our URL reversal computations. We import HTML tag generators from the main html.tags helper modules and we import Flash to provide alert messages for our pages. We’ll show you how flash messages are used when we cover the controller code in more detail in the next couple of pages.
Now, create a controller with paste (you’ve already done this if you were impatient at the beginning of the chapter).
Note
If you have already created the controller using thequickstart at the beginning of the chapter, you will need to add theSQLAlchemy configuration to the development*.ini* file by addingthe following line to the file.
sqlalchemy.url= postgresql+zxjdbc://dbuser:dbpassword@dbhost:port/dbname
Listing 15-13.
$ cd ROSTERTOOL/rostertool
$ paster controller roster
Next, we need to add the metadata for our databasetable to the RosterTool/rostertool/model/__init__.py module. To doso, change the file so that it reads as follows:
Listing 15-14.
"""The application's model objects"""
import sqlalchemy as sa
from sqlalchemy import orm, schema, types

from rostertool.model import meta

def init_model(engine):
    """Call me before using any of the tables or classes in the model"""
    ## Reflected tables must be defined and mapped here
    #global reflected_table
    #reflected_table = sa.Table("Reflected", meta.metadata, autoload=True,
    #                           autoload_with=engine)
    #orm.mapper(Reflected, reflected_table)
    #
    meta.Session.configure(bind=engine)
    meta.engine = engine

metadata = schema.MetaData()

# Create the metadata for the player table, and assign it to player_table
player_table = schema.Table('player', metadata,
    schema.Column('id', types.Integer, primary_key=True),
    schema.Column('first', types.Text(), nullable=False),
    schema.Column('last', types.Text(), nullable=False),
    schema.Column('position', types.Text(), nullable=False),
)

# Create a class to be used for mapping the player_table object
class Player(object):
    pass

# Map the Player class to the player_table object, we can now refer to the
# player_table using Player
orm.mapper(Player, player_table)
Note that we are creatingthe proper metadata for mapping to the player database table. We thencreate an empty Player class object andlater use the orm*.*mapper**to map the metadata to the emptyPlayer object. We can now use the Player object to work with ourdatabase table.
Next, we should alter the index method that iscreated inside the RosterContoller class. We will add an import tobring in the meta**and Player**objects, and change the index**function so that it queriesthe list of players in the database. In the end, the index**function should read as follows:
Listing 15-15.
from rostertool.model import meta, Player
...
def index(self):
    session = meta.Session()
    c.page_title = 'Player List'
    c.players = session.query(Player).all()
    return render('list_players.html')
This code is fairly straightforward; we are simplyusing a SQLAlchemy session to load all the Player objects from diskand assigning to the special context variable c. Pylons is theninstructed to render the list_player.html file.
The context should be your default place to placevalues you want to pass to other parts of the application. Note thatPylons will automatically bind in URL values to the context so whileyou can grab the form values from self.form_result, you can also grabraw URL values from the context.
You should be able run the debug webserver now andyou can get to the front page to load an empty list of players. Startup your debug webserver as you did at the beginning of this chapterand go to http://localhost:5000/ to see the page load with your listof players (currently an empty list).
Now we need to get to the meaty part where we canstart create, edit, and delete players. Well make sure that theinputs are at least minimally validated, errors are displayed to theuser, and that alert messages are properly populated.
First, we need a page that shows just a singleplayer and provides buttons for edit and delete.
Listing 15-16.
<%inherit file="base.html" />

<h2>Edit player</h2>
${h.form(h.url_for(controller='roster', action='save_player', id=c.player.id), method='POST')}
    ${h.hidden('id', c.player.id)} <br />
    ${h.text('first', c.player.first)} <br />
    ${h.text('last', c.player.last)} <br />
    ${h.text('position', c.player.position)} <br />
    ${h.submit('save_player', "Save Player")}
${h.end_form()}

${h.form(h.url_for(controller='roster', action='delete_player', id=c.player.id), method='POST')}
    ${h.hidden('id', c.player.id)} <br />
    ${h.hidden('first', c.player.first)} <br />
    ${h.hidden('last', c.player.last)} <br />
    ${h.hidden('position', c.player.position)} <br />
    ${h.submit('delete_player', "Delete Player")}
${h.end_form()}
This template assumes that there is a playervalue assigned to the context and, not surprisingly, its going tobe a full blown instance of the Player object that we first saw inChapter 12. The helper functions let us define our HTML form usingwebhelper tag generation functions. This means you wont have toworry about escaping characters or remembering the particular detailsof the HTML attributes. The helper.tag functions will do sensiblethings by default. The h is a default template variable thatrefers to the repository of helper functions.
Weve set up the edit and delete forms to pointto different URLs. You might want to conserve URLs, but havingdiscrete URLs for each action has advantages, especially fordebugging. You can trivially view which URLs are being hit on awebserver by reading log files. Seeing the same kind of behavior ifthe URLs are the same, but the behavior is dictated by some formvaluewell, thats a whole lot harder to debug. Its also a lotharder to setup in your controllers because you need to dispatch thebehavior on a per method level. Why not just have separate methodsfor separate behavior? Everybody will thank you for it when they needto debug your code in the future.
Before we create our controller methods forcreate, edit and delete, well create a formencode schema toprovide basic validation. Again, Pylons doesnt provide validationbehaviorit just leverages another library to do so. Add thefollowing class to rostertool/controllers/roster.py:
Listing 15-17.
class PlayerForm(formencode.Schema):
    # You need the next line to drop the submit button values
    allow_extra_fields=True

    first = formencode.validators.String(not_empty=True)
    last = formencode.validators.String(not_empty=True)
    position = formencode.validators.String(not_empty=True)
This simply provides basic string verification onour inputs. Note how this doesnt provide any hint as to what theHTML form looks likeor that its HTML at all. FormEncode canvalidate arbitrary Python dictionaries and return errors about them.
Were just going to show you the add method, andthe edit_player methods. You should try to implement the save_playerand delete_player methods to make sure you understand whats goingon here. First, add the import for the validate**decorator.Next, add the add*_*player**and edit_player functions tothe RosterConroller class.
Listing 15-18.
from pylons.decorators import validate


@validate(schema=PlayerForm(), form='index', post_only=False, on_get=True)
def add_player(self):
    first = self.form_result['first']
    last = self.form_result['last']
    position = self.form_result['position']
    session = meta.Session()
    if session.query(Player).filter_by(first=first, last=last).count() > 0:
        h.flash("Player already exists!")
        return h.redirect_to(controller='roster')
    player = Player(first, last, position)
    session.add(player)
    session.commit()
    return h.redirect_to(controller='roster', action='index')

def edit_player(self, id):
    session = meta.Session()
    player = session.query(Player).filter_by(id=id).one()
    c.player = player
    return render('edit_player.html')
A couple of notes here. The edit_player functionis passed the id attribute directly by Routes. In theedit_player method, player is assigned to the context, but thecontext is never explicitly passed into the template renderer. Pylonsis going to automatically take the attributes bound to the contextand write them into the template and render the HTML output. The c*variable is automatically available in the template namespace muchlike the *h variable as discussed previously.
With the add_player method, were using thevalidate decorator to enforce the inputs against the PlayerForm. Inthe case of error, the form attribute of the decorator is used toload an action against the current controller. In this case, index,so the front page loads.
The SQLAlchemy code should be familiar to you ifyou have already gone through Chapter 12. The last line of theadd_player method is a redirect to prevent problems with hittingreload in the browser. Once all data manipulation has occurred, theserver redirects the client to a results page. In the case that auser hits reload on the result page, no data will be mutated.
Heres the signatures of the remaining methodsyoull need to implement to make things work:
- save_player(self):
- delete_player(self):
If you get stuck, you can always consult theworking sample code on the books web site.
Adding a JSON API
JSON integration into Pylons isvery straight forward. The steps are roughly the same as addingcontroller methods for plain HTML views. You invoke paste, paste thengenerates your controller stubs and test stubs, you add in someroutes to wire controllers to URLs and then you just fill in thecontroller code.
Listing 15-19.
$ cd ROSTERTOOL_HOME/rostertool
$ paster controller api
Pylons provides a special @jsonify decorator whichwill automatically convert Python primitive types into JSON objects.It will *not*convert the POST data into an object though; thats yourresponsibility. Adding a simple read interface into the player listrequires only adding a single method to your ApiController:
Listing 15-20.
@jsonify
def players(self):
    session = Session()
    players = [{'first': p.first,
                'last': p.last,
                'position': p.position,
                'id': p.id} for p in session.query(Player).all()]
    return players
Adding a hook so that people can POST data to yourserver in JSON format to create new player is almost as easy.
Listing 15-21.
import simplejson as json
@jsonify def add_player(self):
obj = json.loads(request.body) schema = PlayerForm() try:
form_result = schema.to_python(obj)
- except formencode.Invalid, error:
- response.content_type = ‘text/plain’ return ‘Invalid: ‘+unicode(error)
- else:
session = Session() first, last, position = obj[‘first’], obj[‘last’], obj[‘position’] if session.query(Player).filter_by(last=last, first=first,
position=position).count() == 0:session.add(Player(first, last, position)) session.commit() return {‘result’: ‘OK’}
- else:
- return {‘result’:’fail’, ‘msg’: ‘Player already exists’}
Unit Testing, Functional Testing, and Logging
One of our favorite features inPylons is its rich set of tools for testing and debugging. It evenmanages to take social networking, turn it upside-down, and make itinto a debugger feature. Well get to that shortly.
The first step to knowing how to test code inPylons is to familiarize yourself with the nose testing framework.Nose makes testing simple by getting out of your way. There are noclasses to subclass, just start writing functions that start with theword test and nose will run them. Write a class that has testprefixed in the name and nose will treat it as a suite of testsrunning each method that starts with test. For each testmethod, nose will execute the setup() method just prior to executingyour test and nose will execute the teardown() method after your testcase.
Best of all, nose will automatically hunt downanything that looks like a test and will run it for you. There is nocomplicated chain of test cases you need to organize in a tree. Thecomputer will do that for you.
Lets take a look at your first test case: welljust instrument the model, in this caseSQLAlchemy. Because themodel layer has no dependency on Pylons, this effectively tests onlyyour SQLAlchemy model code.
In ROSTERTOOL_HOME/rostertool/tests, create amodule called test_models.py with the following content
Listing 15-22.
from rostertool.model import Player, Session, engine

class TestModels(object):

    def setup(self):
        self.cleanup()

    def teardown(self):
        self.cleanup()

    def cleanup(self):
        session = Session()
        for player in session.query(Player):
            session.delete(player)
        session.commit()

    def test_create_player(self):
        session = Session()
        player1 = Player('Josh', 'Juneau', 'forward')
        player2 = Player('Jim', 'Baker', 'forward')
        session.add(player1)
        session.add(player2)

        # But 2 are in the session, but not in the database
        assert 2 == session.query(Player).count()
        assert 0 == engine.execute("select count(id) from player").fetchone()[0]
        session.commit()

        # Check that 2 records are all in the database
        assert 2 == session.query(Player).count()
        assert 2 == engine.execute("select count(id) from player").fetchone()[0]
Before we can run the tests, well need to editthe model module a little so that the models know to lookup theconnection URL from Pylons configuration file. In your test.ini,add a line setting the sqlalchemy.url setting to point to yourdatabase in the [app:main] section.
You should have a line that looks something likethis:
Listing 15-23.
 [app:main]
use = config:development.ini
sqlalchemy.url = postgresql+zxjdbc://username:password@localhost:5432/mydb
Now edit the model file so that the create_enginecall uses that configuration. This is as simple as importing configfrom pylons and doing a dictionary lookup. The two lines you want are
Listing 15-24.
from pylons import config
engine = create_engine(config['sqlalchemy.url'])
and thats it. Your model willnow lookup your database connection string from Pylons. Even better,nose will know how to use that configuration as well.
From the command line, you can run the tests fromROSTERTOOL_HOME like this now:
Listing 15-25.
ROSTERTOOL_HOME $ nosetests rostertool/tests/test_models.py
.
----------------------------------------------------------------------
Ran 1 test in 0.502s
Perfect! To capture stdout and get verbose output,you can choose to use the -sv option. Another nice option is-pdb-failures, which will drop you into the debugger on failures.Nose has its own active community of developers. You can get plug-insto do coverage analysis and performance profiling with some of theplugins. Use nosetests –help for a list of the optionsavailable for a complete list.
Due to the nature of Pylons and its decoupleddesign, writing small unit tests to test each little piece of code isvery easy. Feel free to assemble your tests any which way you want.Just want to have a bunch of test functions? Great! If you need tohave setup and teardown and writing a test class makes sense, then doso.
Testing with nose is a joyyou arent forcedto fit into any particular structure with respect to where you testsmust go so that they will be executed. You can organize your tests ina way that makes the most sense to you.
That covers basic unit testing, but suppose wewant to test the JSON interface to our hockey roster. We really wantto be able to invoke GET and POST on the URLs to make sure that URLrouting is working as we expect. We want to make sure that thecontent-type is properly set to application/x-json. In otherwords, we want to have a proper functional test, a test thats notas fine grained as a unit test.
The prior exposure to the app object when weran the paste shell should give you a rough idea of what is required.In Pylons, you can instrument your application code by using aTestController. Lucky for you, Pylons has already created one for youin your app/tests directory. Just import it, subclass it andyou can start using the app object just like you did inside ofthe shell.
Lets take a look at a functional test in detailnow. Heres a sample you can save intorostertool/tests/functional/test_api.py:
Listing 15-26.
from rostertool.tests import *
import simplejson as json
from rostertool.model.models import Session, Player

class TestApiController(TestController):
    # Note that we're using subclasses of unittest.TestCase so we need
    # to be careful with setup/teardown camelcasing unlike nose's
    # default behavior

    def setUp(self):
        session = Session()
        for player in session.query(Player):
            session.delete(player)
        session.commit()

    def test_add_player(self):
        data = json.dumps({'first': 'Victor',
            'last': 'Ng',
            'position': 'Goalie'})
        # Note that the content-type is set in the headers to make
        # sure that paste.test doesn't URL encode our data
        response = self.app.post(url(controller='api', action='add_player'),
            params=data,
            headers={'content-type': 'application/x-json'})
        obj = json.loads(response.body)
        assert obj['result'] == 'OK'

        # Do it again and fail
        response = self.app.post(url(controller='api', action='add_player'),
            params=data,
            headers={'content-type': 'application/x-json'})
        obj = json.loads(response.body)
        assert obj['result'] <> 'OK'
Theres a minor detail which you can easily misswhen youre using the TestController as your superclass. First off,TestController is a descendant of unittest.TestCase from the standardpython unit test library. Nose will not run setup andteardown methods on TestCase subclasses. Instead, youll haveto use the camel case names that TestCase uses.
Reading through the testcase should show you howmuch detail you can be exposed. All your headers are exposed, theresponse content is exposed; indeed, the HTTP response is completelyexposed as an object for you to inspect and verify.
So great, now we can run small unit tests, biggerfunctional tests; lets take a look at the debugging facilitiesprovided through the web.
Consider what happens with most web applicationstacks when an error occurs. Maybe you get a stack trace, maybe youdont. If youre lucky, you can see the local variables at eachstack frame like Django does. Usually though, youre out of luck ifyou want to interact with the live application as the error isoccurring.
Eventually, you may locate the part of the stacktrace that triggered the error, but the only way of sharing thatinformation is through either the mailing lists or by doing a formalpatch against source control. Lets take a look at an example ofthat.
Were going to startup our application indevelopment mode. Were also going to intentionally break some codein the controller to see the stack trace. But first, well need toput some data into our app.
Add a sqlalchemy.url configuration line to thedevelopment.ini file as you did in the test.ini configuration, andlets startup the application in development mode. Were going tohave the server run so that any code changes on the file system areautomatically detected and the code is reloaded
$paster serve development.ini –reload
Well add a single player John Doe as acenter, and save the record. Next, lets intentionally break somecode to trigger the debugger. Modify the RosterControllers indexmethod and edit the call that loads the list of players. Well usethe web session instead of the database session to try loading thePlayer objects.
Listing 15-27.
def index(self):
    db_session = meta.Session()
    c.page_title = 'Player List'
    c.players = session.query(Player).all()
    return render('list_players.html')
Load http://localhost:5000/ to see the error page.
Theres a lot of information that Pylons throwsback at you. Along the top of the screen, youll see four tabs:Traceback, Extra Data, Template, and Source. Pylons will have put youin the Traceback tab by default to start with. If you look at theerror, youll see the exact line number in the source file that theerror occurred in. Whats special about Pylons traceback tab isthat this is actually a fully interactive session.
You can select the+ signs to expand each stackframe and a text input along withsome local variables on that frame will be revealed. That text inputis an interface into your server process. You can type virtually anyPython command into it, hit Enter, and you will get back liveresults. From here, we can see that we should have used thedb_session and not the session variable. See Figure 15-2.
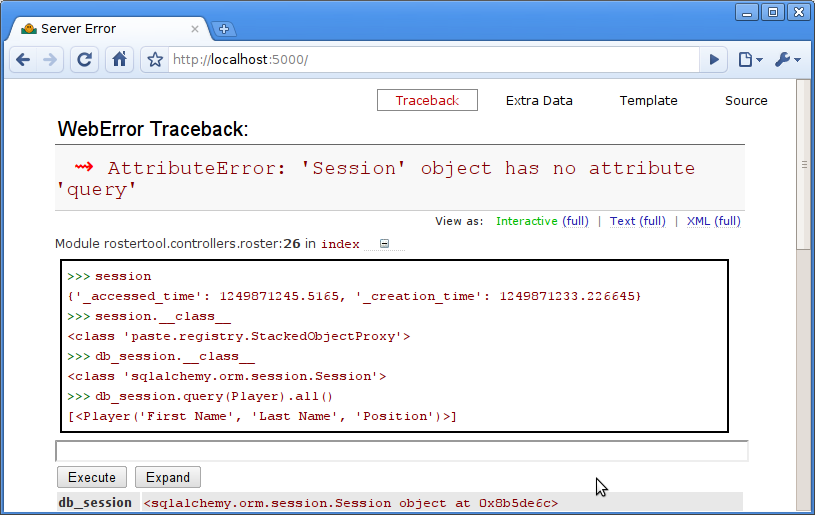
Figure 15-2. Error message caused by use of Session
This is pretty fantastic. If you click on the Viewlink, you can even jump to the full source listing of the Jythonmodule that caused the error. One bug in Pylons at the time ofwriting is that sometimes the hyperlink is malformed. So, althoughthe traceback will correctly list the line number that the erroroccurred at, the source listing may go to the wrong line.
The Pylons developers have also embedded aninterface into search engines to see if your error has beenpreviously reported. If you scroll down to the bottom of yourtraceback page, youll see another tab control with a Search MailLists option. Here, Pylons will automatically extract the exceptionmessage and provide you an interface so you can literally search allthe mailing lists that are relevant to your particular Pylonsinstallation.
If you cant find your error on the mailinglists, you can go to the next tab, Post Traceback, and submit yourstacktrace to a webservice on PylonsHQ.com so that you can try todebug your problems online with other collaborators. Combining unittests, functional tests, and the myriad of debugging options affordedto you in the web debugger, Pylons makes the debugging experience aspainless as possible.
Deployment into a Servlet Container
Deploying your pylons applicationinto a servlet container is very straight forward. Just installsnakefight from PyPI using easy_install and you can start buildingWAR files.
Listing 15-28.
$ easy_install snakefight
...snakefight will download and install here ...
$ jython setup.py bdist_war --paste-config test.ini
By default, snakefight will bundle a completeinstance of your Jython installation into the WAR file. What itdoesnt include is any JAR files that your application depends on.For our small example, this is just the postgresql JDBC driver. Youcan use the –include-jars options and provide a comma separated listof JAR files.
Listing 15-29.
$ jython setup.py bdist_war \
    --include-jars=postgresql-8.3-604.jdbc4.jar \
    --paste-config=test.ini
The final WAR file will be located under the distdirectory. It will contain your postgreql JDBC driver, a completeinstallation of Jython including anything located in site-packagesand your application. Your war file should deploy without any issuesinto any standards compliant servlet container.
Summary
Weve only scratched the surfaceof whats possible, but I hope youve gotten a taste of what ispossible with Pylons. Pylons uses a large number of packages so youwill need to spend more time getting over the initial learning curve,but the dividend is the ability to pick and choose the libraries thatbest solve your particular problems. It would be helpful to take alook at some other resources such as The Definitive Guide toPylons from Apress, which is also available online athttp://pylonsbook.com.